In this section, you can customize the interface for the users of your accounts (tenants).
Except for the email-templates, all customizations require a custom domain at “Accounts > Domain Mapping” (see above).
ATTENTION: Customizations of the UI (e.g. custom wallpaper, logos and colours) are controlled by the domain the user is using and not by the account to which a user belongs! Please ensure that you give your users and customers the right URL to access the system to see the customizations.
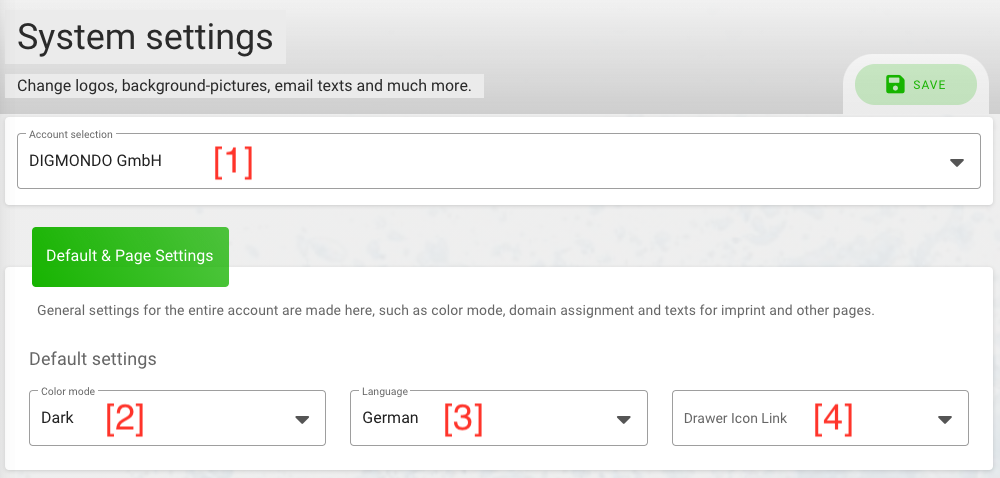
To start the customization, you first need to select an account in the field “account selection” [1] at the top of the page. Depending on the domain settings for the selected account, you can see different sections:
Default & page settings
This is only accessible if a domain is set for this account. This section allows you to customize the default language and color mode for new accounts.
- Color mode: Select if users use by default the light or dark mode of the user interface [2]. Users can change this setting for their browser via the “gearwheel” button on the top right corner.
- Language: Select the default language [3]. Users can change this setting for their browser via the “gearwheel” button on the top right corner.
- Drawer icon link: Select where a click on the icon on the top-left corner leads [4]. This only works if a user logs in via the subdomain configured in domain mapping .
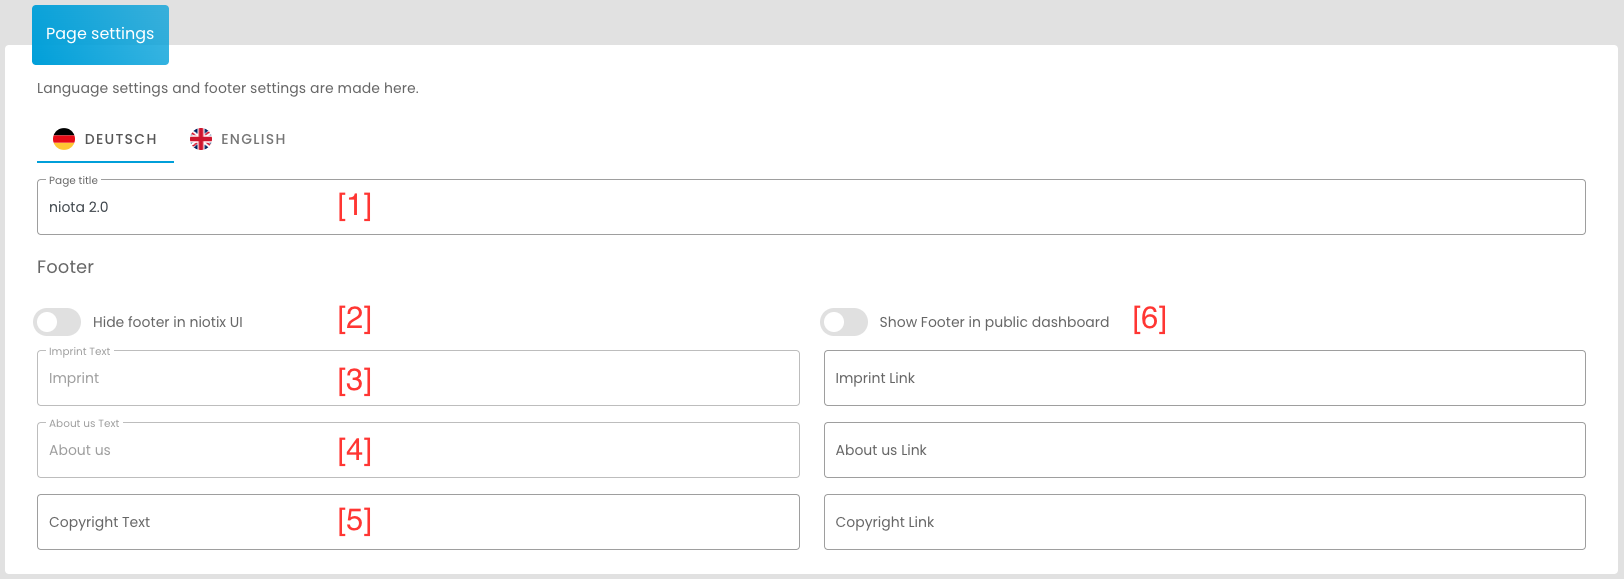
Page settings
This is only accessible if a domain is set for this account. Here you can customize some organization-individual links in the system. With the tabs for German and English language, you can switch between both languages:
- Page title: Define your own title in niotix [1].
- Display footer: Enable/disable show footer in user interface. [2]
- Imprint link: Insert the link to the imprint (e.g. an external website) [3]. About Us Link: Insert the link to your About Us page (e.g. an external website) [4].
- Copyright Text: Here you can either insert the name of the link to the copyright or you can use this line for a link title of your choice [5].
- Copyright Link: Insert a link to the copyright or a page of your choice. [5].
- Show footer in public dashboard:** Enable/disable show footer in user interface. [6]
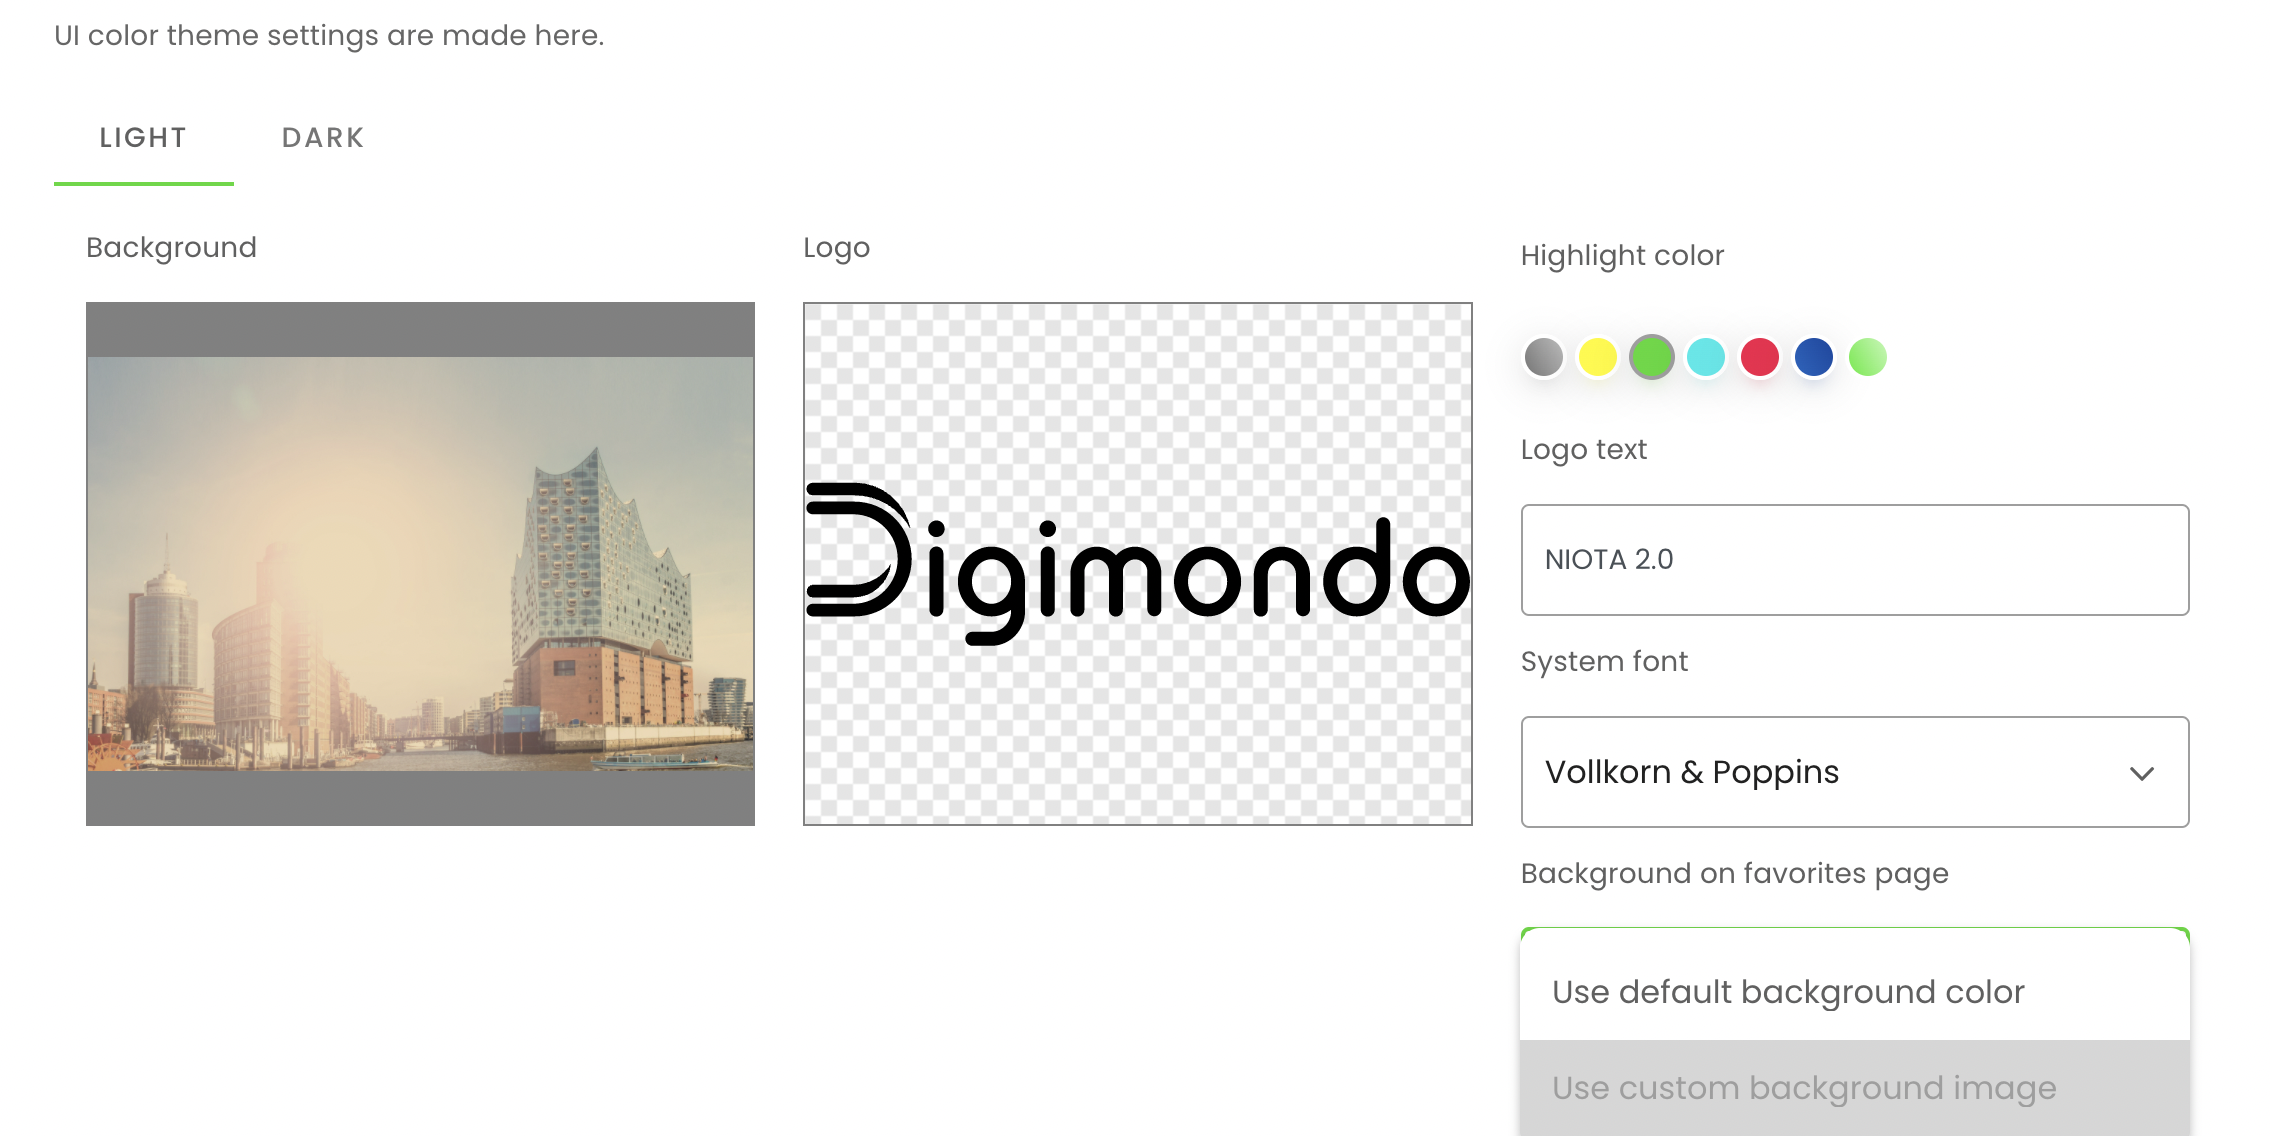
UI color theme
This is only accessible if a domain is set for this account. With the tabs “light” and “dark” you can switch between different themes and customize the wallpaper, logo etc.
-
Background: Set a custom background for the login-page – only functions when the domain from “domain mapping is used” and all other pages after logging into niotix.
-
Logo: Insert your own logo that will be displayed in the upper left corner, e.g. your company logo. Ideally, the logo should be a PNG file with a transparent background and in widescreen format (4:1 relation).
It is recommended to have two versions of the logo, one for light and one for dark mode.
-
Highlight color: Select the highlight color – e.g. for selected menu items or headlines. You can choose between six colours or add a custom color via HEX color code. Users can change this setting for their browser via the “gearwheel”-button on the top right corner later.
-
Logo text: Set a custom text displayed beside the logo on the top left corner.
-
System Font: You can now choose “Vollkorn & Poppins” in addition to the previous “Roboto” font, which matches with our new branding.
-
Background on favorites page: For your favorites page you can choose between the default background color or your selected background image as background.
INFO: The system is using the logo, background and colour from the system owner (“root account”) for creating new accounts.
Email settings
You can customize the outgoing system emails which are send to users (e.g. for resetting the password) for each account.
If you want to send out system emails from your domain (e.g. “noreply@mycompany.com”), you need to configure the email server in “Settings > Accounts > Email Server Settings” first. Otherwise, niotix will use its default settings (if set in case of an on premise installation).
niotix provides the possibility to customize different system emails to your needs, e.g. include your organization-specific welcoming or different languages.
To use advanced features of HTML emails, niotix uses the template engine pug. With pug, you have a user friendly and simplified version of HTML to write custom emails. To learn how to use the pug template engine, have a look at https://pugjs.org/ on the right side in the section “language reference”. For a quick start, niotix already provides some examples which are ready to use.
You can set up custom emails for:
- Password changed: The email users will receive when the password was changed.
- Password forgotten: The email users will receive when they reset their password.
- Activate account: The email users will receive when a new account is created.
- Account locked: The email users will receive when the account was locked due to too many wrong login attempts.
- Connector connection error: The email all users with the permission “SystemNotication.read” for the selected account receive, if a connector in the “settings > accounts” is in a defective state.
For each template, you can define:
- Subject: the title of the email [1]
- Content: the body (text) of the email [2]
Beyond this, niotix allows using variables (placeholders) which are used in the emails. All available variables in the subject and content are displayed directly under the corresponding text boxes [3]. You can set variables with the textfields:
- Site name: Use this placeholder to define the name of your plattform [4].
- Site base URL: Use this placeholder to define the custom domain in emails [5].
To validate your template, use the “show preview”-button [6]. If successful, niotix will show you a preview in a new window. If the template contains an error, the error will be displayed.

Customer feedback
With the corresponding authorisation as account administrator, this field appears on the system page. By default, no own email address is used here, so the email address of the next higher account (often root) is used here. If the option “Use own email address” is active, you can set the email address to which the help and feedback requests that the users enter via the question mark button at the top go. You can put in the fields the addresses to which error messages (“I don’t like something”) and the other two feedback requests (“I like something” and “I have a suggestion”) will be sent.

Custom Terms & Conditions
If you resell niotix licences to your customers, it may be necessary to define your own terms of use. This is possible under this paragraph.
By activating the switch “Use custom terms & conditions”, your own terms of use are activated. If this switch is deactivated, the Digimondo terms of use are used.

For some changes to the terms of use it is necessary to have them confirmed again by the users, even if consent has already been given. This is possible if the checkbox “Request consent again from users who have already given consent”.

By default, the checkbox is set so that the consent of all users is requested again after each change is saved, even if it has already been granted. To avoid a new request, the tick should be removed before saving the changes.