This section describes the features of the digital twin, which can be accessed through the corresponding menu in the main menu. The functions are displayed to you according to your assigned role. Depending on your role, you are allowed to view, edit or create a digital twin.
hierarchy
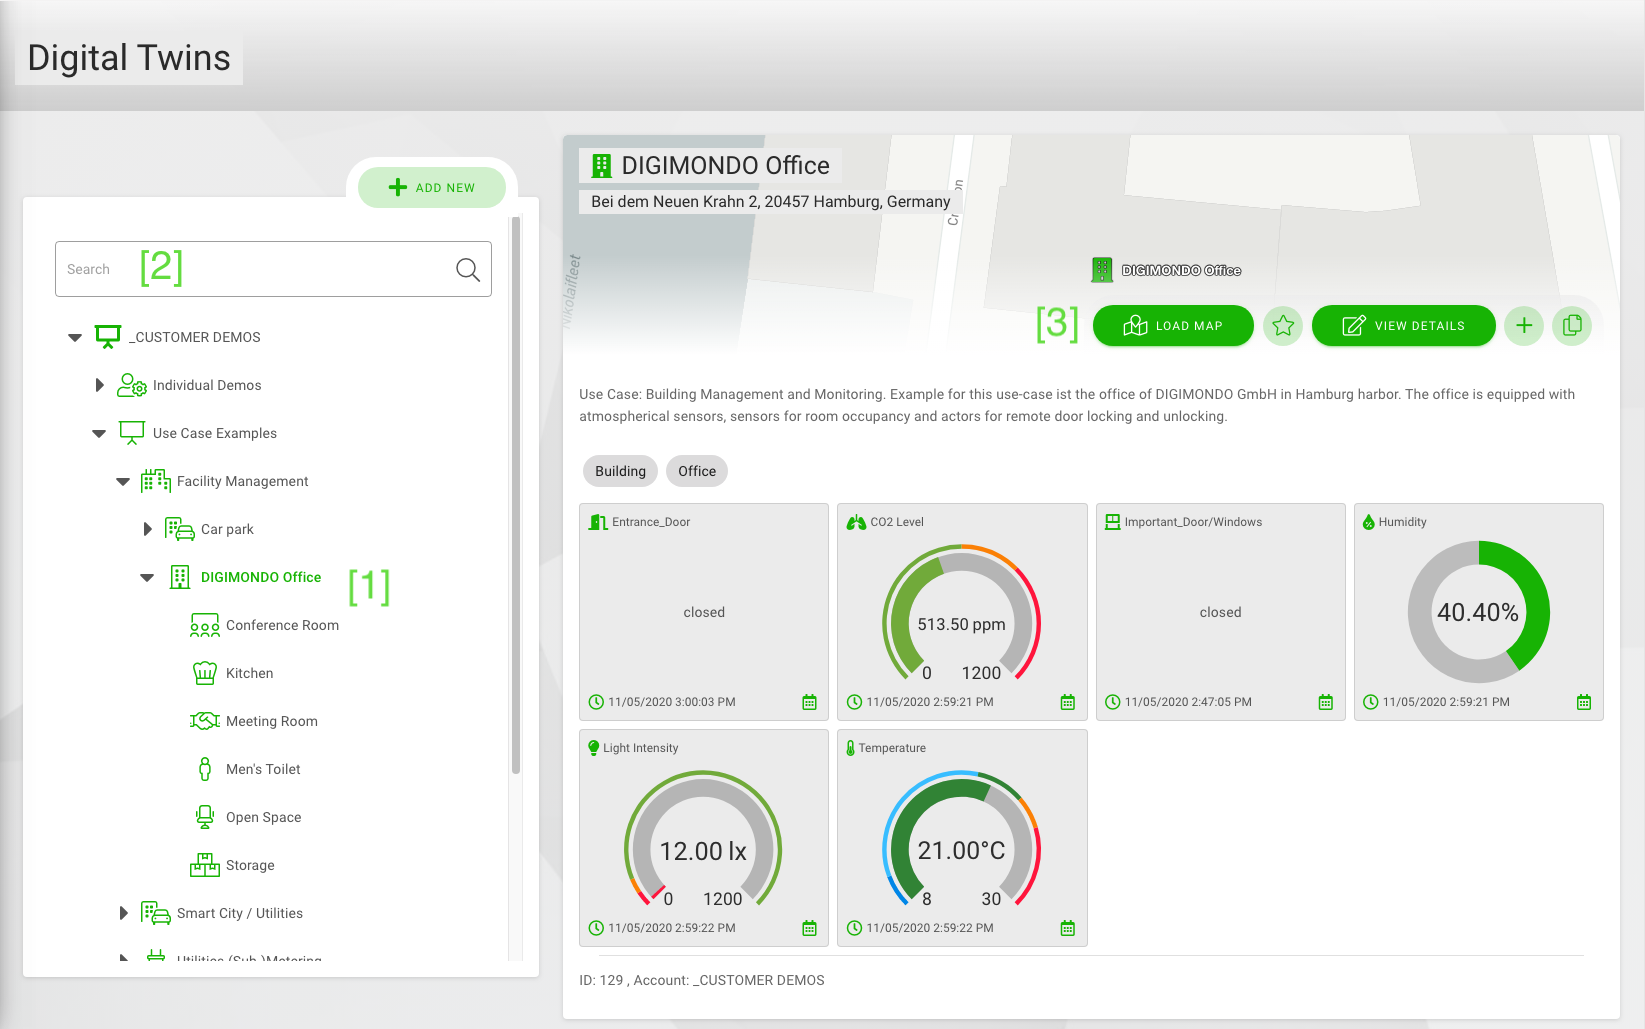
The first page of the menu, “digital twin” gives you an overview of all available digital twins. You can navigate through the tree hierarchy and fold or unfold digital twins (1). You can also switch from the tree hierarchy to a simple list view by clicking the button in the upper right corner. In this view, you can filter the twins by accounts with the button on the top.
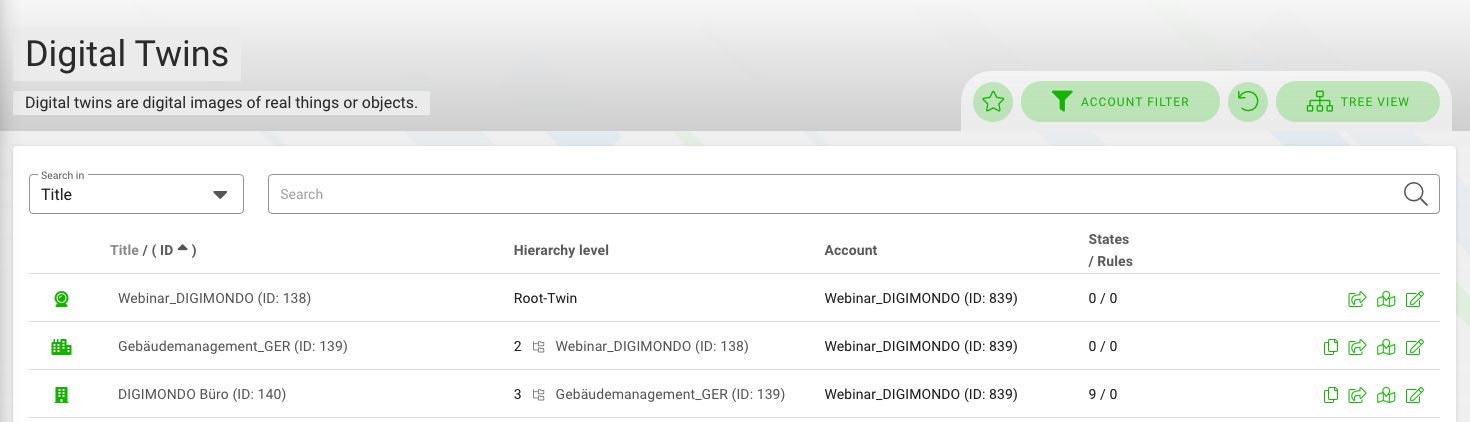
With the search field, you can search by the name of a digital twin (2). The hierarchy is automatically filtered.
To see more details of a digital twin, you click on its name. Open the map view with the location of the digital twin via the button “Load map” on the top right (3). In the tree hierarchy of Digital Twins, the ID is displayed next to the title.
By clicking on the “star” icon, you can filter for the twins you marked as favorites.
Map view
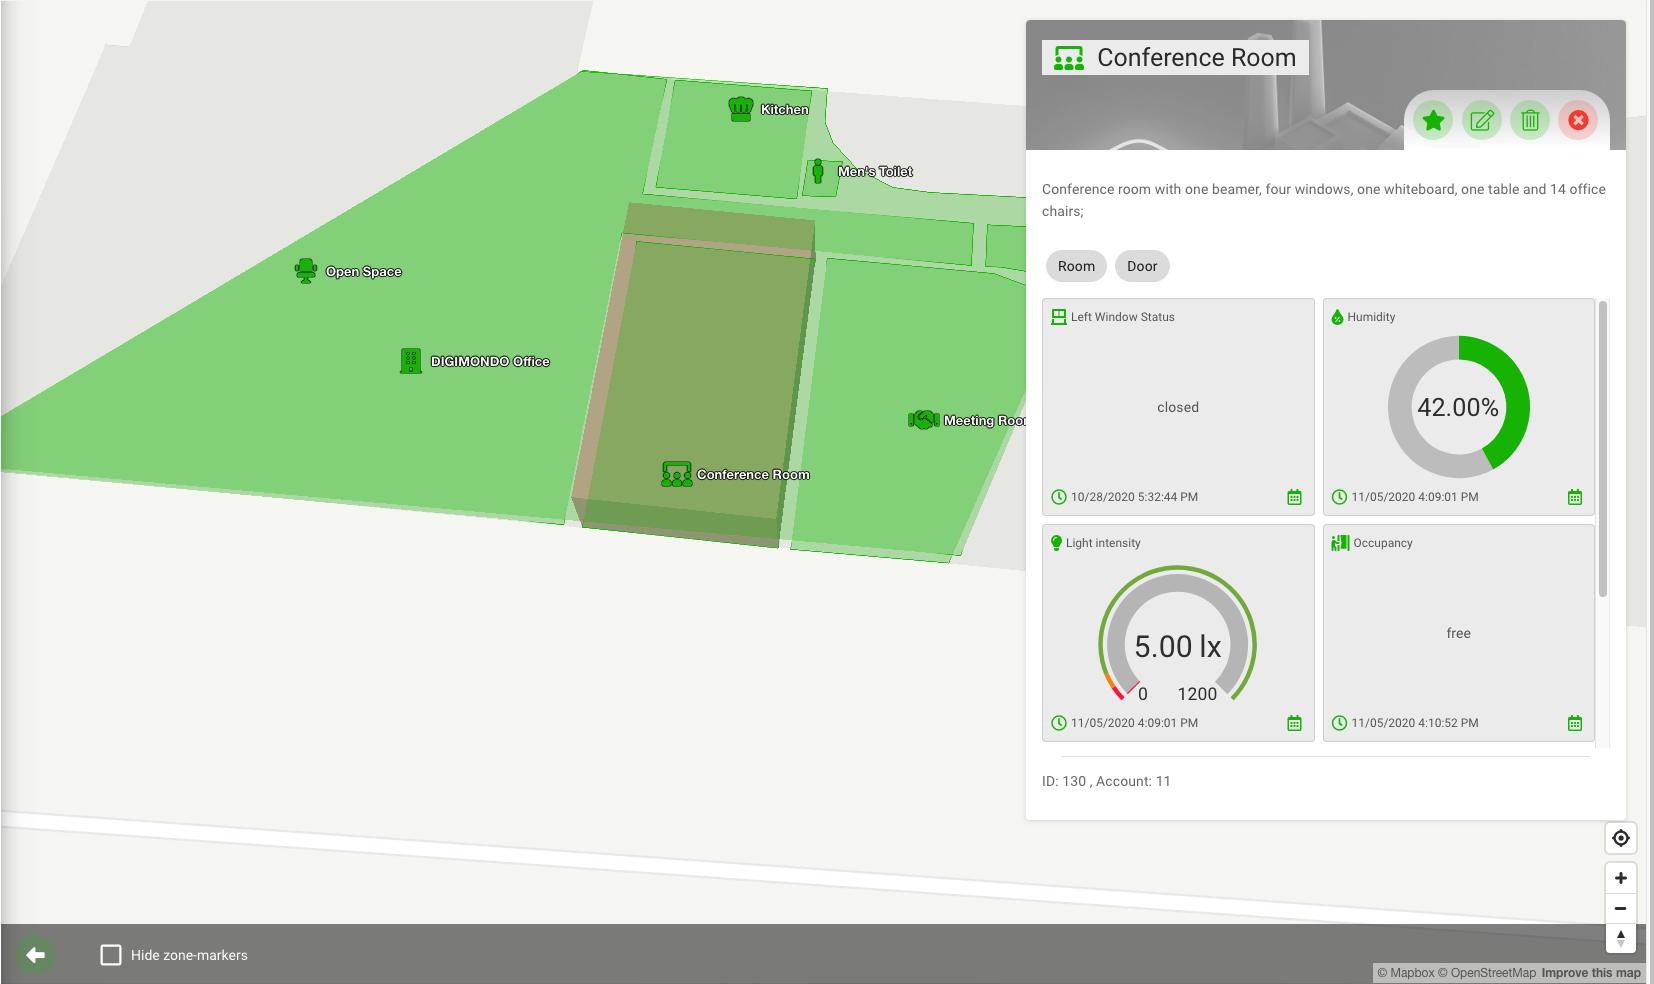
If you select a digital twin and click on the “Load map” button, you can see the twin and its sub-twin on a map. Like in other applications like Google maps, you can move the visible section of the map by clicking and dragging.
If you click on a digital twin, the dashboard with the states of the twin opens up. You can edit states directly here.
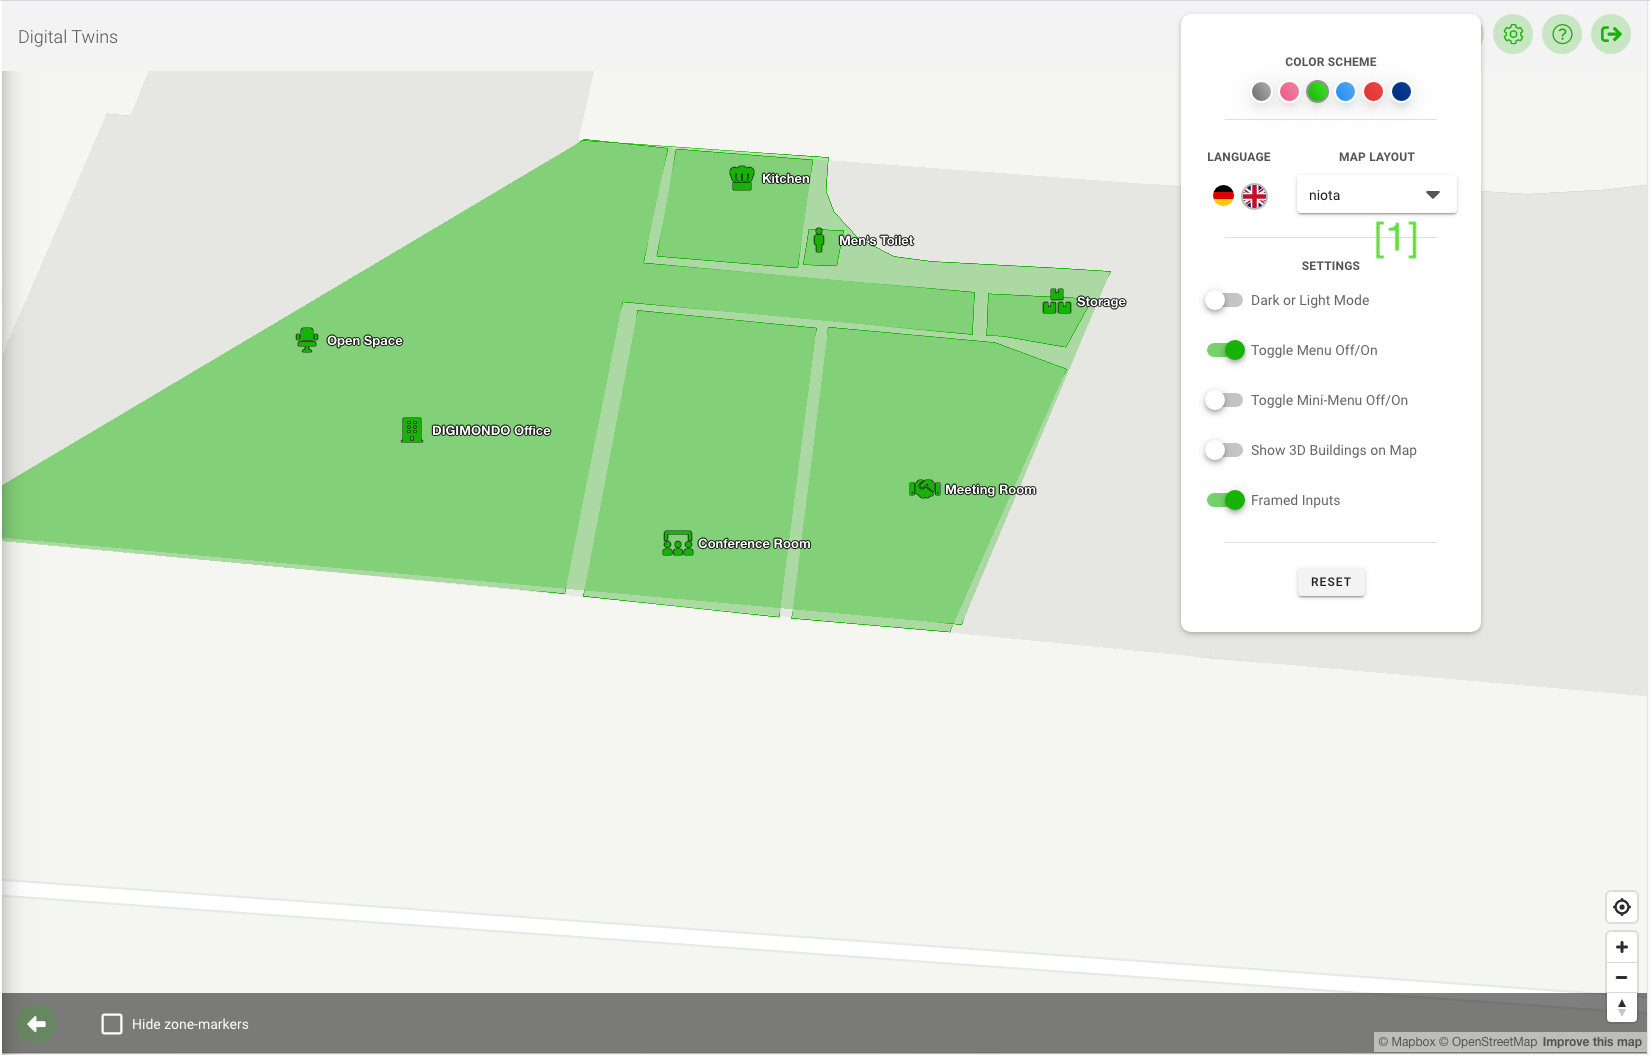
With a click on the “Settings”-Button () in the lower-left corner, you can open the map settings. Here you can change the view of the map. You can filter by tags associated with the states so that only the corresponding states appear. In addition, you can select states so that certain state values are displayed directly in the map with the coloring corresponding to the value. You define the color in each state itself, e.g., in the visualization of a data point value as a dial gauge.
Click on the “Customize Interface”-Button () in toolbar on the top right to switch between different appearances of the map view in the settings of your browser.
With one click on the button of the map, you can return to the digital twin detail page.
Create and edit a new digital twin
To create a new digital twin, select the parent digital twin in the hierarchy and click on the “+” icon [1]. A new digital twin will be created as a child of the selected digital twin.
To edit a digital twin, select the digital twin in the hierarchy and click on the pencil icon [2].
To duplicate the selected digital twin, click on the “papers” icon [3]. The digital twin will be duplicated and saved on the same hierarchy level.
If you have admin rights, you can delete a digital twin with a click on the trash bin icon [4].

Duplicate and import digital twins
You can use the copy function to duplicate a digital twin and create up to 100 digital twins at the same time. You can use the CSV upload here to quickly and easily perform a mass import.
You cannot copy a root twin, so the duplicate button is not displayed here. Duplicating is only possible with “sub” twins. Only the selected twin is copied at a time. If you copy a twin under which other sub-twins are arranged, only this one twin is duplicated.
Duplicate data states based on virtual devices
With these steps you duplicate a twin with data points based on virtual devices:
-
With these steps you duplicate a twin with data points based on virtual devices:

-
A pop-up appears in which the duplicates can be configured. Select “Virtual devices” in the data state selection mode.
Now there is the possibility to create the duplicates via CSV import, or via the interface.
Creating duplicates via CSV import
To create the duplicates via CSV import, first download the sample CSV file as a template. After filling in the CSV file, it can be uploaded again and the duplication triggered.
Note the information given in the user interface for the structure of the file.
Create duplicates via user interface
Number of copies: Specify how many copies of the twin should be created. Depending on the selection, a column appears for each desired duplicate (maximum 100).
-
Parental Object: If the toggle button “Use the same parent twin for all” is activated, the input field is activated and a uniform twin can be selected under which all duplicates are hung. The fields for the parent objects of the individual duplicates are deactivated by this.
In the following line, the meta data to be configured can be selected, which are to be changed during copying. Input fields are added to the respective twins.
If these fields are not activated, the respective data of the twin to be copied are taken over.
-
Tags: Assign tags to the copies of the twin.
-
Address: Assign an address to the copies of the twin.
-
Geo-coordinates Config: If this field is activated, geo-coordinates (latitude & longitude) can be defined for each copy.
-
Custom Properties: If this field is activated, any number of user-defined properties can be added to each copy in the format “Key: Value”.
Meta Data
- Title: Specify the title of the copy of the twin.
- Parental Objekt: Select which twin is to be the parent object if the copied twin is to be subordinate to another sub-twin, for example.
Data States
- The following section displays the title data points based on Virtual Devices (or on IoT Datahub devices). To create duplicates, the External ID of the device to which the data points of the new copy are to be linked must be entered here.
- Data State Options: There are three dots behind each input field for the External ID. By clicking on them, it can be defined for each data point that this data point should not be created in a duplicate. In addition, it is possible to define that this data point should be created, but not connected to a virtual device (“Source Type: None”).
This function is only possible for data points based on Virtual Devices.
- Five copies are always displayed per page. To add or edit further copies, you can switch between the individual pages with five copies each at the bottom.
When all mandatory fields have been completed, the “Duplicate” button is activated. If the import job has been successfully created, a confirmation appears. The digital twins are created in the background via an import job. The status of the import can be viewed in the background jobs. Errors are also listed here if digital twins cannot be imported.
Duplicate data points based on IoT Data Hub devices
Use these steps to duplicate a twin:
-
To duplicate the selected digital twin, click on the “Copy” icon, the second button from the left at the top.
-
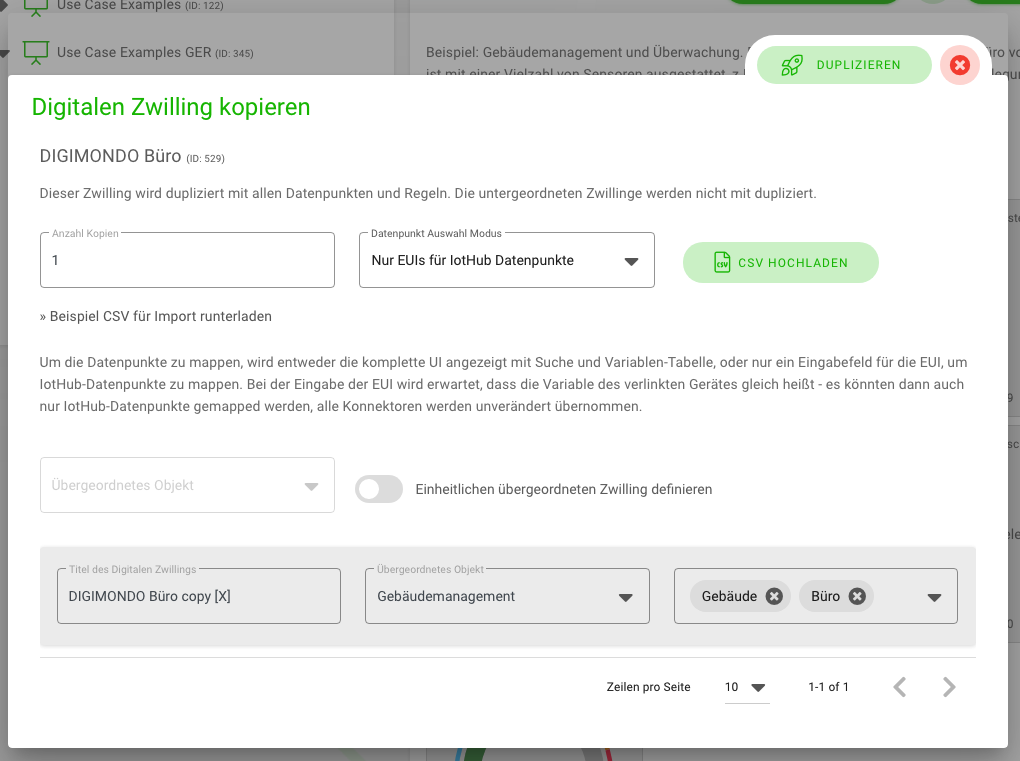
A pop-up window will appear, in which you will enter the following information.
- Number of copies: Specify how many copies of the twin should be created. Then, at the bottom of the field, according to the number, more gray boxes will appear, where you can enter the information.
- Datapoint selection mode: Here you can choose between “Complete” and “Only EUIs for IoT Hub data points.” To map the states, you can either use the complete UI with search and variable-picker or have a reduced UI with just a field for EUIs for each IoT Hub state. In the latter case, it is expected that the variable-name of the linked IotHub device is the same - and only IotHub states can be mapped, all connectors will be copied untouched. If you want to use the CSV upload, this only works under “Only EUIs for IoT Hub data points.”
- Parental object: If you click the adjacent button “Use the same parent twin for all,” the field will be activated, and you can select one twin as parent object for all copied twins.
- Title of digital twin: Enter the title of the copy of the twin.
- Parental Object: Select which of the twins should be considered as the parent object if the copied twin should be subordinated to another sub-twin, for example.
- Tags: Immediately assign tags to the copies of the twin.
-
If you choose the CSV upload option, you can upload a CSV file with the information for the duplicates under the “Upload CSV” button. You can download a sample file from the link below the “Number of copies” input window. If you include the latitude and longitude information in your CSV file, a polygon will automatically be created in the map around the position of the copied twin.
-
When all mandatory fields are filled in, the button “Duplicate” will be activated. With one click, you can create the copies. If the addition was successful, a confirmation will appear. The new twins will appear on the list immediately.
Mass Synchronization of Digital Twins
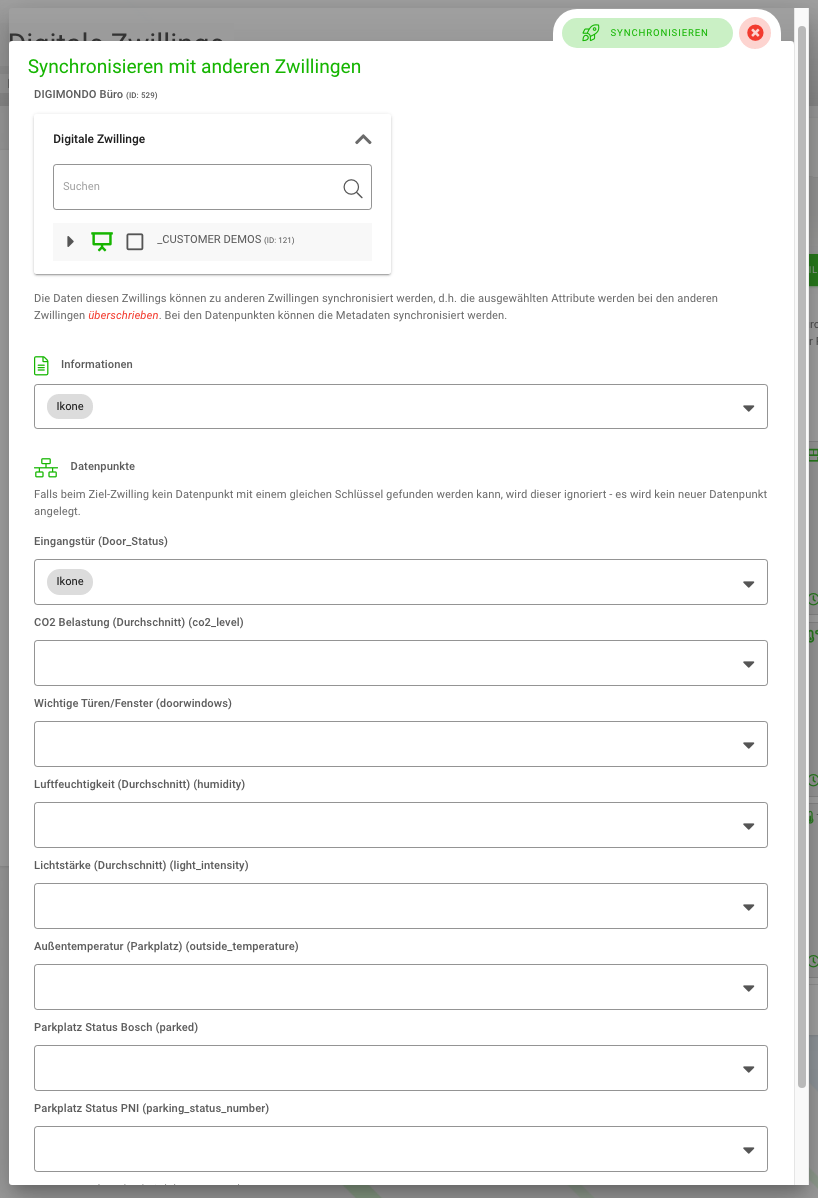
You can synchronize a Digital Twin with one or more twins in a few steps. Information such as the title, twin type, icon of the twin, or visualizations of its states is thus simply overwritten to other twins and all synchronized uniformly. This is especially useful when updating javascript transformers, for example.
-
Click on the button on the far right of the top bar. Then a window opens, in which all twins available for you are shown in a list. Synchronization is also possible across accounts, so if you have access to multiple accounts, you can see all the twins available to you. Select the twins you want to synchronize with the opened twin.
-
Below the list of twins is the “Information” field where you select which information or data points that are part of the selected twin should be synchronized with the other twins. This information will be overwritten in the other twins if there is an identical data point key in them. The synchronization can be done for the basic values such as title, unit, icon, visualization, and javascript transformer.
-
When all mandatory fields are filled in, the “Synchronize” button is activated. With one click you can perform the synchronization.