Device templates can be used to manage a large number of virtual devices consistently from a central point. The device template defines certain configuration parameters for the devices linked to it. It is possible to adapt this configuration from the device template and synchronise it with the linked virtual devices. Configuration parameters that are specified from a device template cannot be changed individually in the virtual device.
When creating new virtual devices on the basis of a device template, the specified configuration settings are predefined by this template so that, for example, groups & tags are already predefined and the user does not require any application-specific background knowledge.
The feature will be introduced with release 3.1.0 and is currently in beta status. However, we do not expect any major bugs/changes to the functionality. Nevertheless, for large use cases, we recommend waiting until the beta status has been lifted before using device templates.
Overview of existing device templates
The “Device templates” menu item can be used to call up an overview of the device templates available.
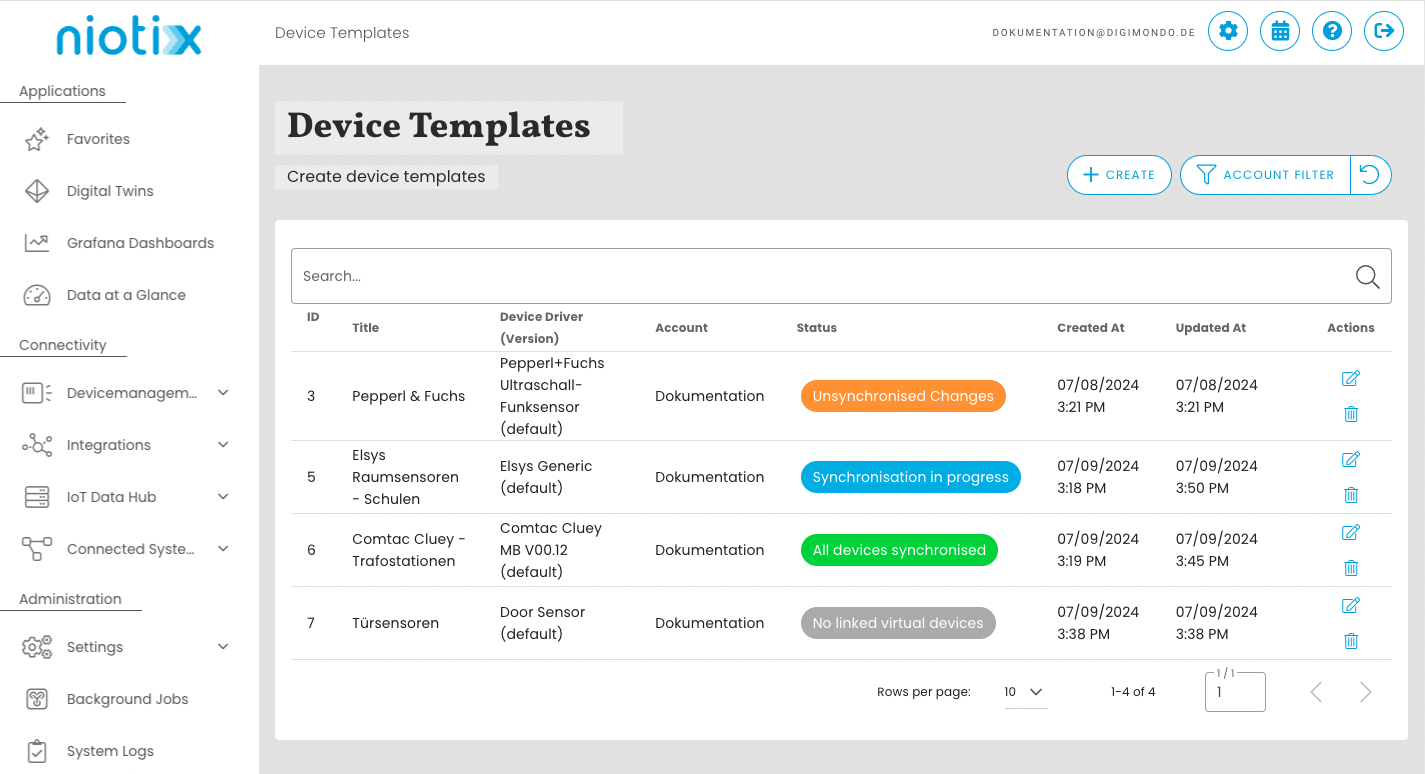
The following information is displayed:
- ID: Unique ID of the device template (can be used for search).
- Title: Title defined by the user for this device template (can be used for search).
- Device driver: Device driver used by the device template (can be used for search).
- Account: The account to which this device template belongs (can be filtered using the account filter).
- Status:
- Changes that have not been synchronized: There are changes to the device template that have not yet been synchronized to the devices. To synchronize the changes, the device template can be opened via the edit icon and synchronization can be started in the “Changes” tab.
- No linked virtual devices: There are no virtual devices linked to this device template yet.
- Not synchronized changes: Changes have been made to the device template that have not yet been synchronized to the linked devices. (Indicated by an orange dot in front of title)
- Synchronization in progress: A synchronization process has been started but has not yet been completed.
- Synchronization failed:: The last synchronization failed. Details can be found in the detailed report of the background job. Changes can be made to the device template and a new synchronization process can be started.
- Created: Creation date of the device template.
- Updated: Date of the last update of the device template.
Creating device templates
Device templates can be created via the menu item of the same name. The button for creating templates is located on the right below the overview. The following information must be entered:
- Title: The title of the device template should be as descriptive as possible.
- Account: Account in which the device template is to be created. Device templates can only be used by virtual devices of the same account.
- Device driver: Device driver to be used for the template.
- Parent object: All digital twins that have their own authorization area can be selected here. This setting also defines the access area of the virtual devices that are linked to this template.
The number of device templates that can be created is limited to 3 by default. This setting can be adjusted by the customer advisor.
Copying device templates
An existing device template can be copied to create a new device template with the same configuration baseline (e.g. states, device status config, rules, tags/groups). The new device template can then be adapted independently from the source template.
The copy dialog can be opened via the menu item Device Management -> Device Templates using the Copy action in the row of the source template.
The following fields are required in the copy dialog:
- Title: New title of the copied device template
- Account: Target account for the copied device template
- Parent object: Target digital twin (must belong to the selected account)
- Connector: Connector for the copied device template in the selected account
The Device driver is inherited from the source template and is read-only in the copy dialog.
During copy, a connector must be selected explicitly. The copy process then applies connector-aware transformations:
- The copied device template gets the selected connector as
connectorId - Connector-specific template data is reset (connector data is initialized empty)
- Rule actions that reference the source connector are remapped to the new connector
- Connector references in action parameters (e.g.
configId,bridgeId) are remapped accordingly
If a copied rule contains actions that reference a connector different from the source connector, these actions are removed from the copied rule because they cannot be safely mapped to the newly selected connector.
In this case, the copy still succeeds, but with warnings (UI message: Template copied with warnings).
Typical example:
- Action A: Command points to source connector -> remapped to new connector
- Action B: Command points to another connector -> skipped in copied device template
Copy is rejected in the following cases:
- The selected account does not exist
- The selected parent object does not exist or is not in the selected account
- The selected connector is invalid or not part of the selected account
- A template with the same title already exists in the target account
- The template limit of the target account is reached
- The source template has no connector reference
- The source template driver/version is no longer available
Result of a successful copy:
- A new independent device template is created (including draft and productive version)
- It is not linked to virtual devices by default, and synchronization history is not copied
- After creation, the copied device template can be edited and synchronized as usual
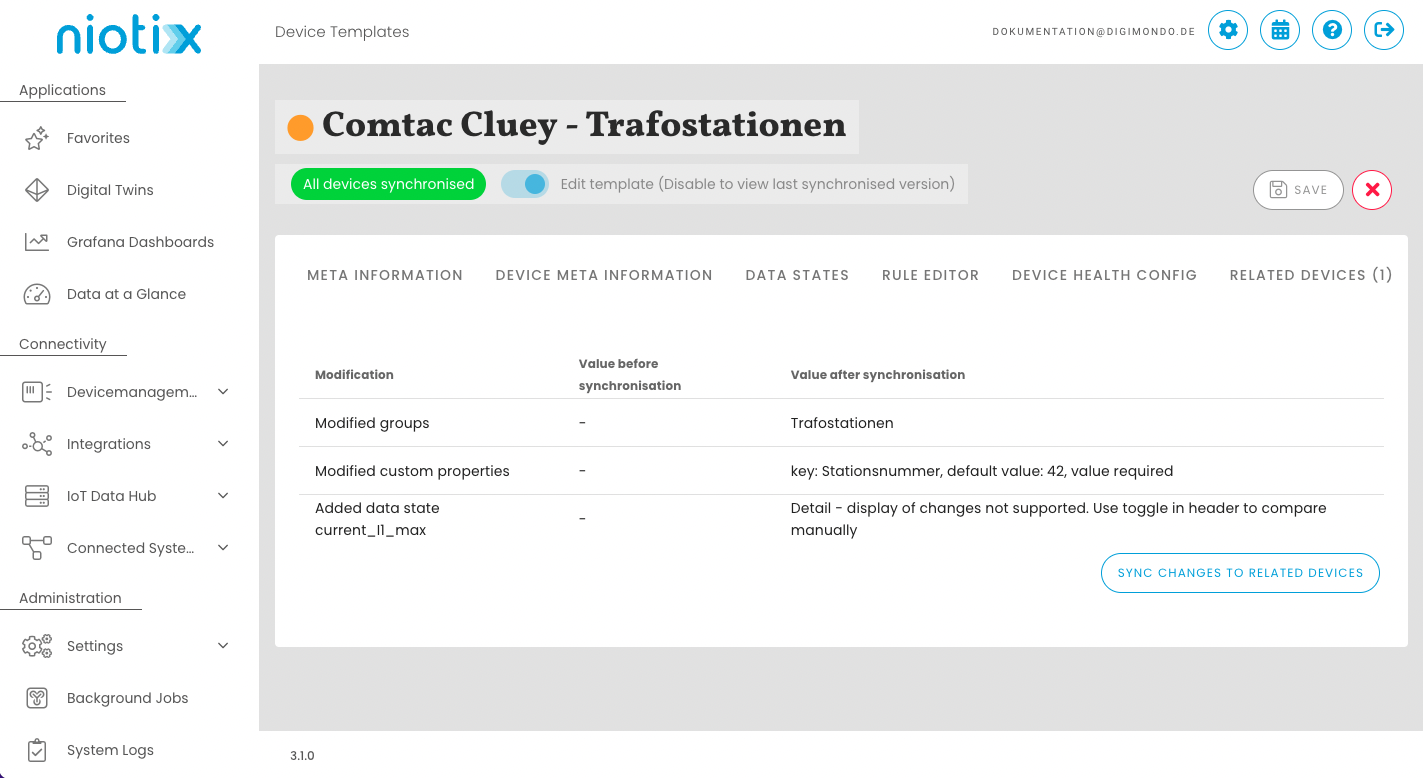
Editing device templates
Changes can be made to a device template without affecting the linked devices. Device templates have an edit mode for this purpose, which can be activated and deactivated using the switch below the title. This allows the current settings used by the virtual devices to be viewed and changes to be made. Changes are displayed in tabular form in the “Changes” tab and thus allow a view of the adjustments that are rolled out during synchronization with the linked devices. The button to start synchronization can also be found in this tab.
Synchronize changes
Once all changes to the configuration for the virtual devices have been completed, the adjustments can be synchronized in the “Changes” tab using the “Synchronize changes” button. In order to ensure that synchronization is traceable for large numbers of devices, this process is carried out in a background job. The progress of the process can be viewed there under the menu item “Virtual devices mass edits”.
While a synchronization is running, the template can still be edited. However, it is not possible to start a new synchronization while the process is running.
Create virtual devices based on a device template
The following section explains the different options for creating virtual devices based on a device template.
Create individual virtual devices based on a device template
Virtual devices can be created via the menu item Device Management –> Virtual Devices. There is a ‘Create’ button. Select the ‘Use device template for creation’ option in the dialogue.

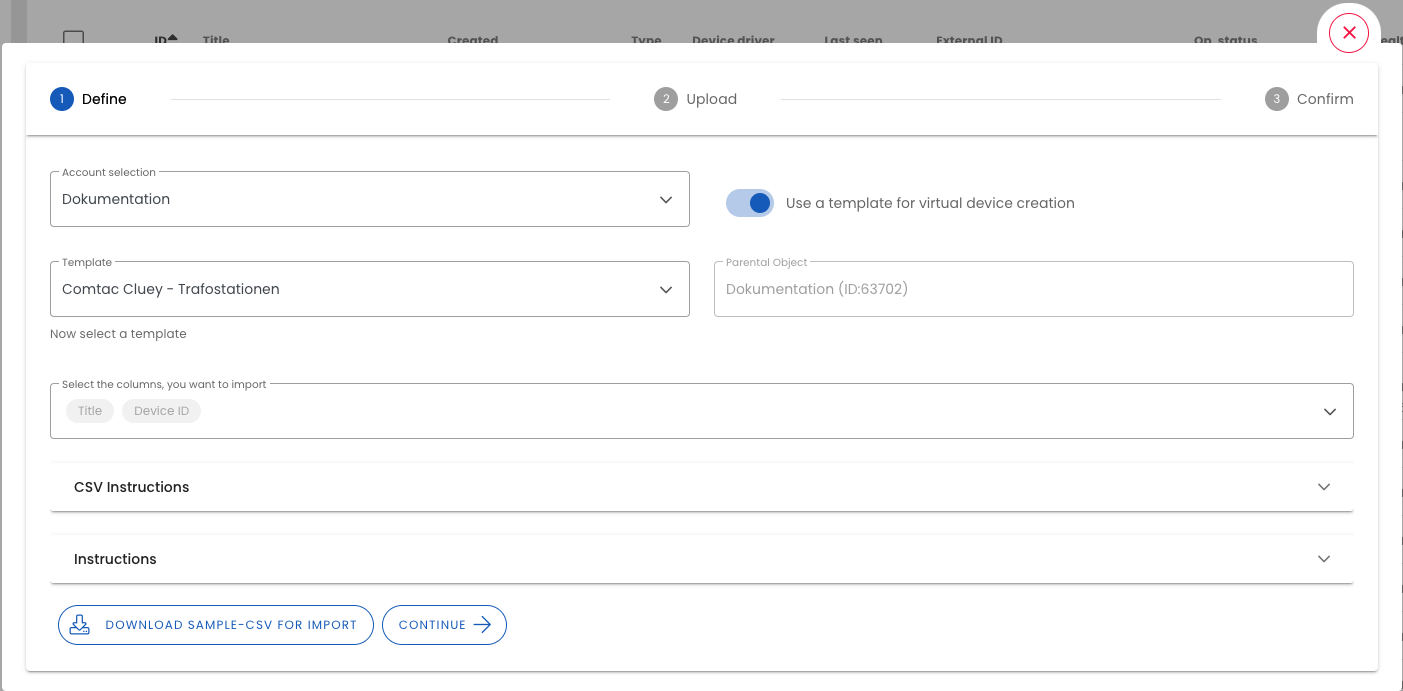
Creating multiple virtual devices via CSV import based on a device template
The CSV import can be accessed via the menu item Device Management -> Virtual Devices -> button. Select the option ‘Create virtual devices based on a device template’ in the dialogue
Link existing virtual devices to a device template
Mass editing can be accessed via the menu item Device Management -> Virtual Devices. Here, virtual devices can be selected manually or using filter criteria The ‘Edit selection’ button opens the mass processing dialogue. Here you can select the ‘Link virtual devices with a device template’ mode.
If device templates exist that have the same account, connector and device driver as the selected virtual devices, these will be offered for selection in step 2.
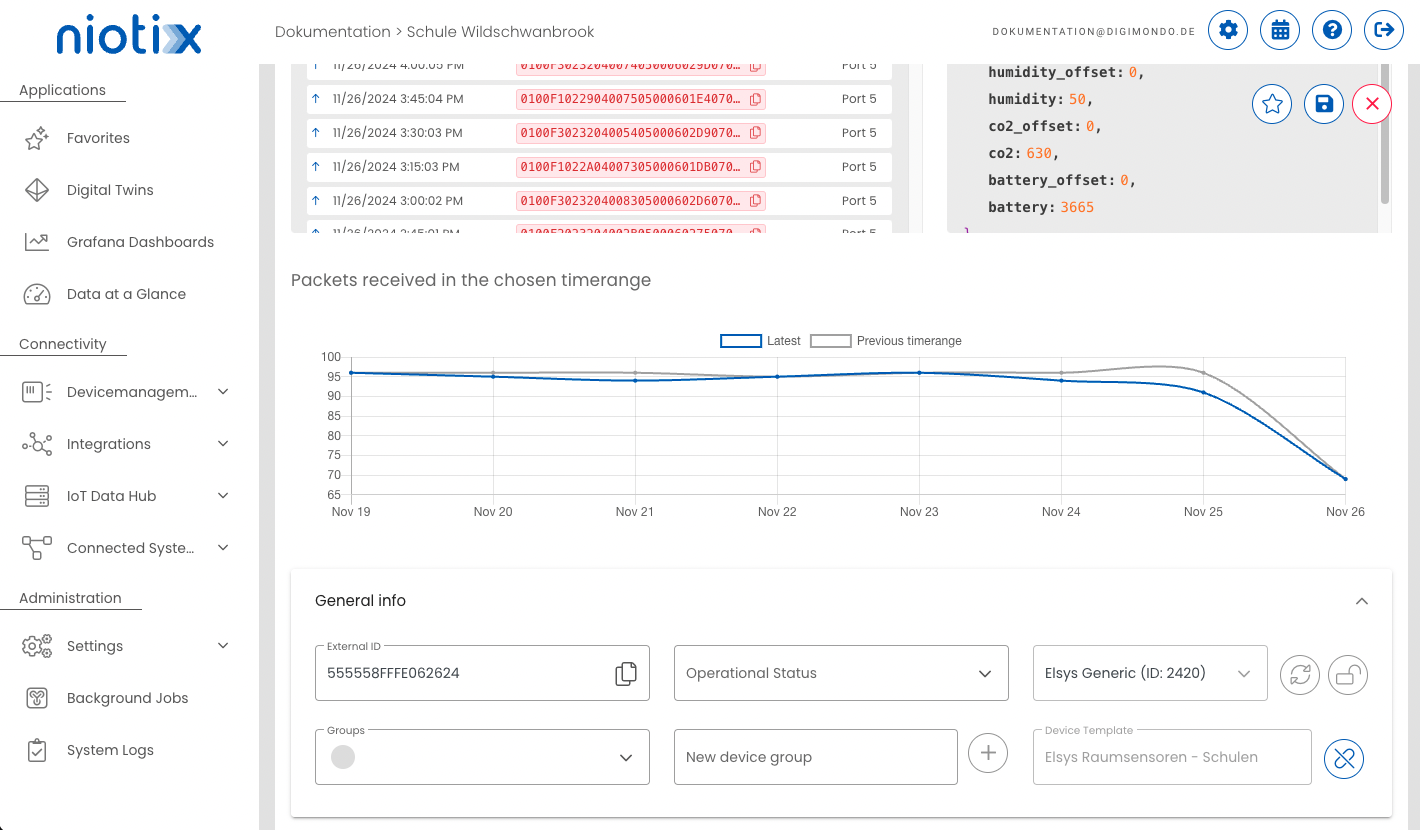
Unlink a device template from a virtual device
Via the menu item Device Management -> Virtual Devices, individual virtual devices can be edited by clicking the Edit icon. In the “Device Information” tab, under the “General Information” section, the linked device template can be found. Here, the link can be removed by clicking the button.