With the announcement tool, you can inform users in your account or sub-accounts directly within niotix. This is helpful in case of new updates, future maintenance slots or company updates. There are two possibilities how to display announcements to users:
- As a banner on top of each page (see picture 1)
- As a message on the “home”-page (see picture 2)
Picture 1:

Picture 2:

Announcements are displayed to users until the expiration time is over or the user manually deactivates the announcement. Note that, once an announcement is closed, users cannot access it again!
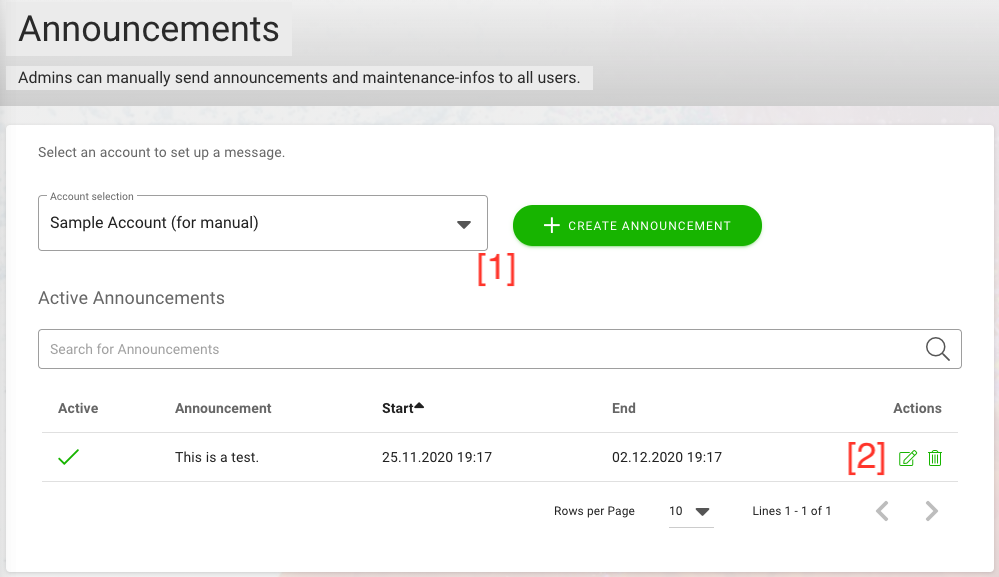
In the overview at “Settings > Announcements”, you can create new announcements [1], see past announcements and their status and edit or delete existing announcements [2].
Create Announcement
To create a new announcement, you first have to select the account for which it will be applied and then click on “create announcement” [1].
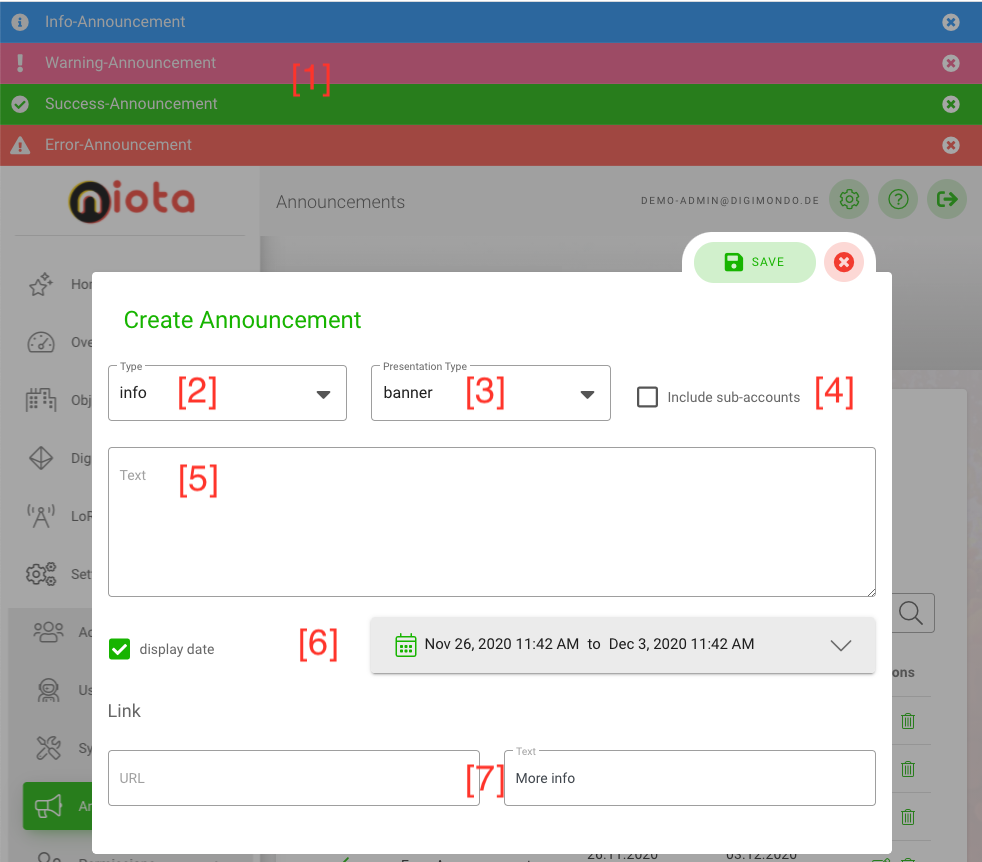
In the new window, you can configure your announcement:
- Type: You can choose between 4 different types of visualizations for announcements (info, warning, error, success), which differ in the background color and icon displayed 1], [2
- Presentation Type: Select whether you want to display a banner or message [3].
- Include sub-account: If selected, all user in the sub-accounts of the selected account will see the announcement as well [4].
- Text: Add your announcement-text [5].
- Display Date: If activated, you can select a timeframe with the date picker in which the announcement will be displayed to the users. It will be automatically deactivated if the end date is over [6].
- Link: You can add a link to any 3rd-party-site for more information. Just add a URL and name of the link in these fields. The link will be added to the above defined text. [7]
Edit Announcement
To edit an announcement, click on the “pen & pencil” icon in the overview for the corresponding announcement. You can change all settings of existing announcement similar to when creating a new announcement, which is described above.