Depending on the type of digital twin, you can configure different properties in the first tab.
For all digital twins you can set up the geo-location, which can be a single position and additionally a geographical area (see below for description) or visualize the different locations and the movement of a digital twin in a certain period and area.
Define single point location
To set up the location of a digital twin, fill out the following fields:
- Address: Type in the address where the digital twin should be displayed on the map. If the address is found in our database, the latitude and longitude will automatically be added.
- Latitude, Longitude: As an alternative, you can also fill in these fields manually.
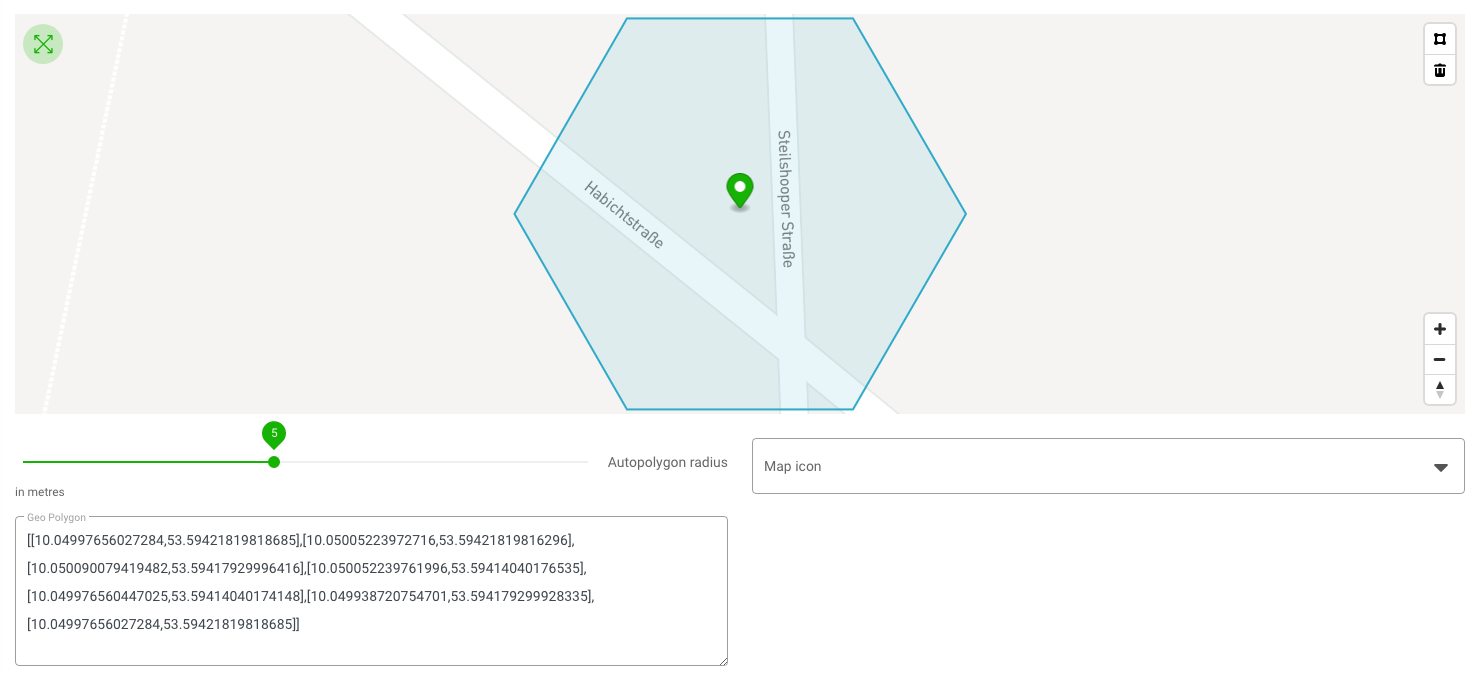
Automatically defined polygon
As soon as you enter an address, a static polygon is automatically created around each map icon of a digital twin, the radius you can freely set using the button below the map. This allows you to visualize the status of moving digital twins in the map. If you move only the map icon in the map, the polygon will move accordingly. If you click on the polygon, you can move it individually or delete it by clicking on the trash can icon in the map for the current view. You cannot save this view, it will automatically create a new polygon when you open the twin again. Below the map you will find the field “Geo Polygon”, where the latitude and longitude are automatically listed.
If you click on the rectangular icon in the upper right corner of the map, you can create the area around the map icon in the shape you want.
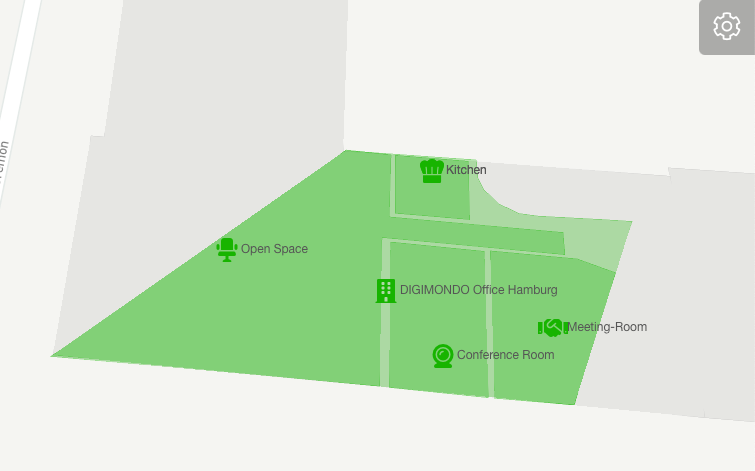
This is useful when visualizing multiple twins located at the same address.

Customize icon in map view
In addition, you can customize what icon is used for the map view. By default, the icon defined in the field “icon” will be used.
- Map icon: Add a URL to an image (e.g. company logo or picture of the physical object).
NOTE: This only affects the map view, which can be reached when you select a digital twin in the hierarchy and click on the button “load map” (see section “Map view” above). The background banner of a digital twin and the preview in the “Digital Twin Details” will not display the custom icon.
Map Mode: Standard and Coordinate History
Under the “Details” tab, you can select two map modes: “Standard” and “Coordinate History”. Under Standard, the simple one-point location is displayed on the map. If you select Coordinate History, the different locations and the movement of a Digital Twin in a certain time period and a certain area will be visualized. You can use the arrows in the map to click the map icon to the different positions of the geo-history. You can zoom the map in the standard format with one click and zoom in on this form with the scroll wheel.

Map setting floor/floor with overlay wizard to include floor plans in map view
If you select “Floor” as twin type in the “Information” tab, the field “Floor settings (indoor)” appears under the “Details” tab. You can select this type if the twin is an indoor area, such as a floor of a building. If this selection is not made, the twin will automatically be interpreted as an out-of-building location.
You can enter a floor number or a floor name in the field. The floor number is additional information to the twin’s title. It is used for external identification and to display a floor switcher on the map.
You can easily embed the floor plans and plans of a building into the map view of a digital twin with the help of an assistance program. This way, you can also visualize relevant buildings from the inside, e.g., see the sensor’s exact position more easily.
- Click on the green button “Overlay Assistant”, then a new window opens with the wizard for embedding images in the map of the twin.
- Upload the image to be included. It will appear in the left part of the window.
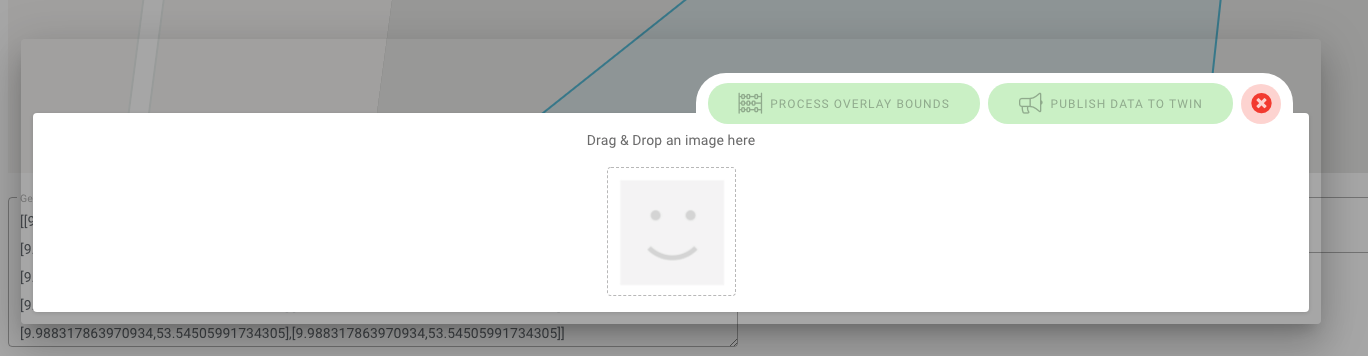
- In the right field enter the address or coordinates of the area over which you want to place the image.
- Click on two places in the image left pane to create anchor points. These can be moved afterward.
- Then select their world coordinates in the map on the right. Note that the red and blue markers in both maps correspond to the same coordinates! Tip It is best to use prominent features like building corners, chimneys, etc. that are easy to assign.
- Click on the button “Calculate Overlay Bounds”. The image will now be transferred to the map view and rotated accordingly based on the position of the anchor points. The rotated image appears below the longitude and latitude data.
- Click on the button “Transfer data to twin”. The image now appears in the map view.